Continuous Integration (CI) is the act of automating the build and testing of your code when it’s committed to version control. For a small app like my blog, I wanted to setup CI without needing to create accounts with TravisCI or CircleCI. This is where Github Actions comes to the rescue. Actions is a workflow automation tool and has a variety of different uses. You could send an SMS, build and push a docker image, run code coverage, and much more. Today, I want to show you how to use Github Actions to setup a CI pipeline for your Phoenix app.
Create the Workflow
This tutorial assumes, you already have a Phoenix app and you’re using Github as your repository. In your project, create a file under <your-phoenix-app>/.github/workflows. Choose any name for your file and save it with the the yaml (.yml) extension e.g. phoenix_test.yml. Add the code below to the file. Before we commit and push let’s understand what’s actually happening.
# <your-phoenix-app>/.github/workflows/phoenix_text.yml
name: Elixir CI

on:
  push:
    branches: [ master ]
  pull_request:
    branches: [ master ]
  workflow_dispatch:

jobs:
  run-tests:
    runs-on: ubuntu-latest
    container: node:10.18-jessie
    services:
      postgres:
        image: postgres:12
        ports: ['5432:5432']
        env:
          POSTGRES_PASSWORD: postgres
        options: >-
          --health-cmd pg_isready
          --health-interval 10s
          --health-timeout 5s
          --health-retries 5
    steps:
      - uses: actions/checkout@v2
      - uses: actions/setup-elixir@v1
        with:
          elixir-version: '1.10.3'
          otp-version: '22.3'
      - run: mix deps.get
      - run: mix deps.compile
      - run: cd assets && yarn install --frozen-lockfile
      - run: mix test
        env:
          DB_PASSWORD: postgres
          DB_HOST: postgres
Code Breakdown
Before we dive in, let’s quickly touch on the basic structure of an Action. A Github Action consists of a workflow. A workflow has many jobs. And a job is made up of steps. In the code above, our workflow is the entire yml file. We’ve named our workflow Elixir CI. Inside our workflow we have one job, run-tests. If we had multiple jobs, they would run in parallel. Inside a job we have many steps. Each step will run sequentially. Once all the steps have finished our job will be complete. Once all the jobs have finished our workflow will be complete. And once our workflow is done Github will report the results. Now that we know the structure, let’s move on.
name: Elixir CI

on:
  push:
    branches: [ master ]
  pull_request:
    branches: [ master ]
  workflow_dispatch:

...
name defines the name of our workflow. You will see this name when you view your action on Github.
on defines the events that trigger your workflow. In this case, we will run our workflow when we push to master. Or when a pull request is opened against master.
workflow_dispatch allows us to manually trigger our builds. This key is optional. Since we have a pretty simple workflow, we don’t really need this. But it can be helpful for debugging. Note, that there’s no value. If the key exists, Github will configure everything properly.
...
jobs:
  run-tests:
    runs-on: ubuntu-latest
    container: node:10.18-jessie
...
jobs defines the jobs that your workflow runs. We only have one job and it’s called run-tests. You could name your jobs anything.
runs-on declares what virtual machine your Github Action runs on. Your options are Mac, Windows, or Linux. Most of the time you would run on Linux. But for some cases you might want to run Windows or Mac. For example, if you needed to convert a Microsoft powerpoint to a PDF, you would have to run your Action on windows. An important concept to remember is that every Github Action runs on a virtual machine.
container declares containers for our VM. A Github Action will spin up a virtual machine (VM). Whatever you run will be run on that machine. In this case, we are adding node to our VM via a container.
services:
  postgres:
    image: postgres:12
    ports: ['5432:5432']
    env:
      POSTGRES_PASSWORD: postgres
    options: >-
      --health-cmd pg_isready
      --health-interval 10s
      --health-timeout 5s
      --health-retries 5
services declares the tools needed to run our task. These tools are installed via a container, with networking already configured. In our case we want to setup Postgres for our tests to run on. We do this by pulling in the postgres:12 container. We expose the port 5432 and set our password to postgres. Finally, we do a health-check on the database to make sure it’s started correctly by passing in some options. pg_isready is a utility command found in Postgres that checks the connection status of the server. Note: >- is a special yml syntax. It means anything after >- is combined as one line with no newline character (\\n).
steps:
  - uses: actions/checkout@v2
  - uses: actions/setup-elixir@v1
    with:
      elixir-version: '1.10.3'
      otp-version: '22.3'
  - run: mix deps.get
  - run: mix deps.compile
  - run: cd assets && yarn install --frozen-lockfile
  - run: mix test
    env:
      DB_PASSWORD: postgres
      DB_HOST: postgres
Finally to the fun part! Everything before steps was needed to set up our environment. Now we can actually do things. You’ll notice 4 keywords here: uses, with, run, env. Let’s go through each one.
uses selects an action to run as a step. Github has a rich ecosystem of actions. And we can reuse these actions in our own workflow. An example of this is the actions/checkout@v2. The checkout action pulls our code down from Github onto the VM.
with passes input parameters to the external Action. In the case of actions/setup-elixir@v1 we are passing in the elixir version and the Erlang OTP version. Note: setup-elixir works best if you specify the exact versions.
run executes a command line command.
env sets environment variables on that command. For example, when running mix test we will set the DB_PASSWORD and the DB_HOST environment variables.
Knowing these keywords, we can read our steps like this:
- Pull down our codebase using a checkout action.
- Install Elixir v1.10.3 and Erlang OTP v22.3 using the setup-elixir action.
- Get the dependencies for our Phoenix app.
- Compile the dependencies.
- Install the frontend assets using yarn.
- Run our tests with two environment variables
DB_PASSWORDandDB_HOST.
Gotcha
Since we’re running everything inside the docker container, the Postgres service will need a postgres hostname. If you’re like me, you may have configured test.exs to connect to your local database with different credentials. To get the mix test step working you can edit your test.exs to include the System.get_env command. Where app is your Phoenix application name.
config :app, App.Repo,
  username: "postgres",
  password: System.get_env("DB_PASSWORD") || "localhost",
  database: "app_test#{System.get_env("MIX_TEST_PARTITION")}",
  hostname: System.get_env("DB_HOST") || "localhost",
  pool: Ecto.Adapters.SQL.Sandbox
Running the Workflow
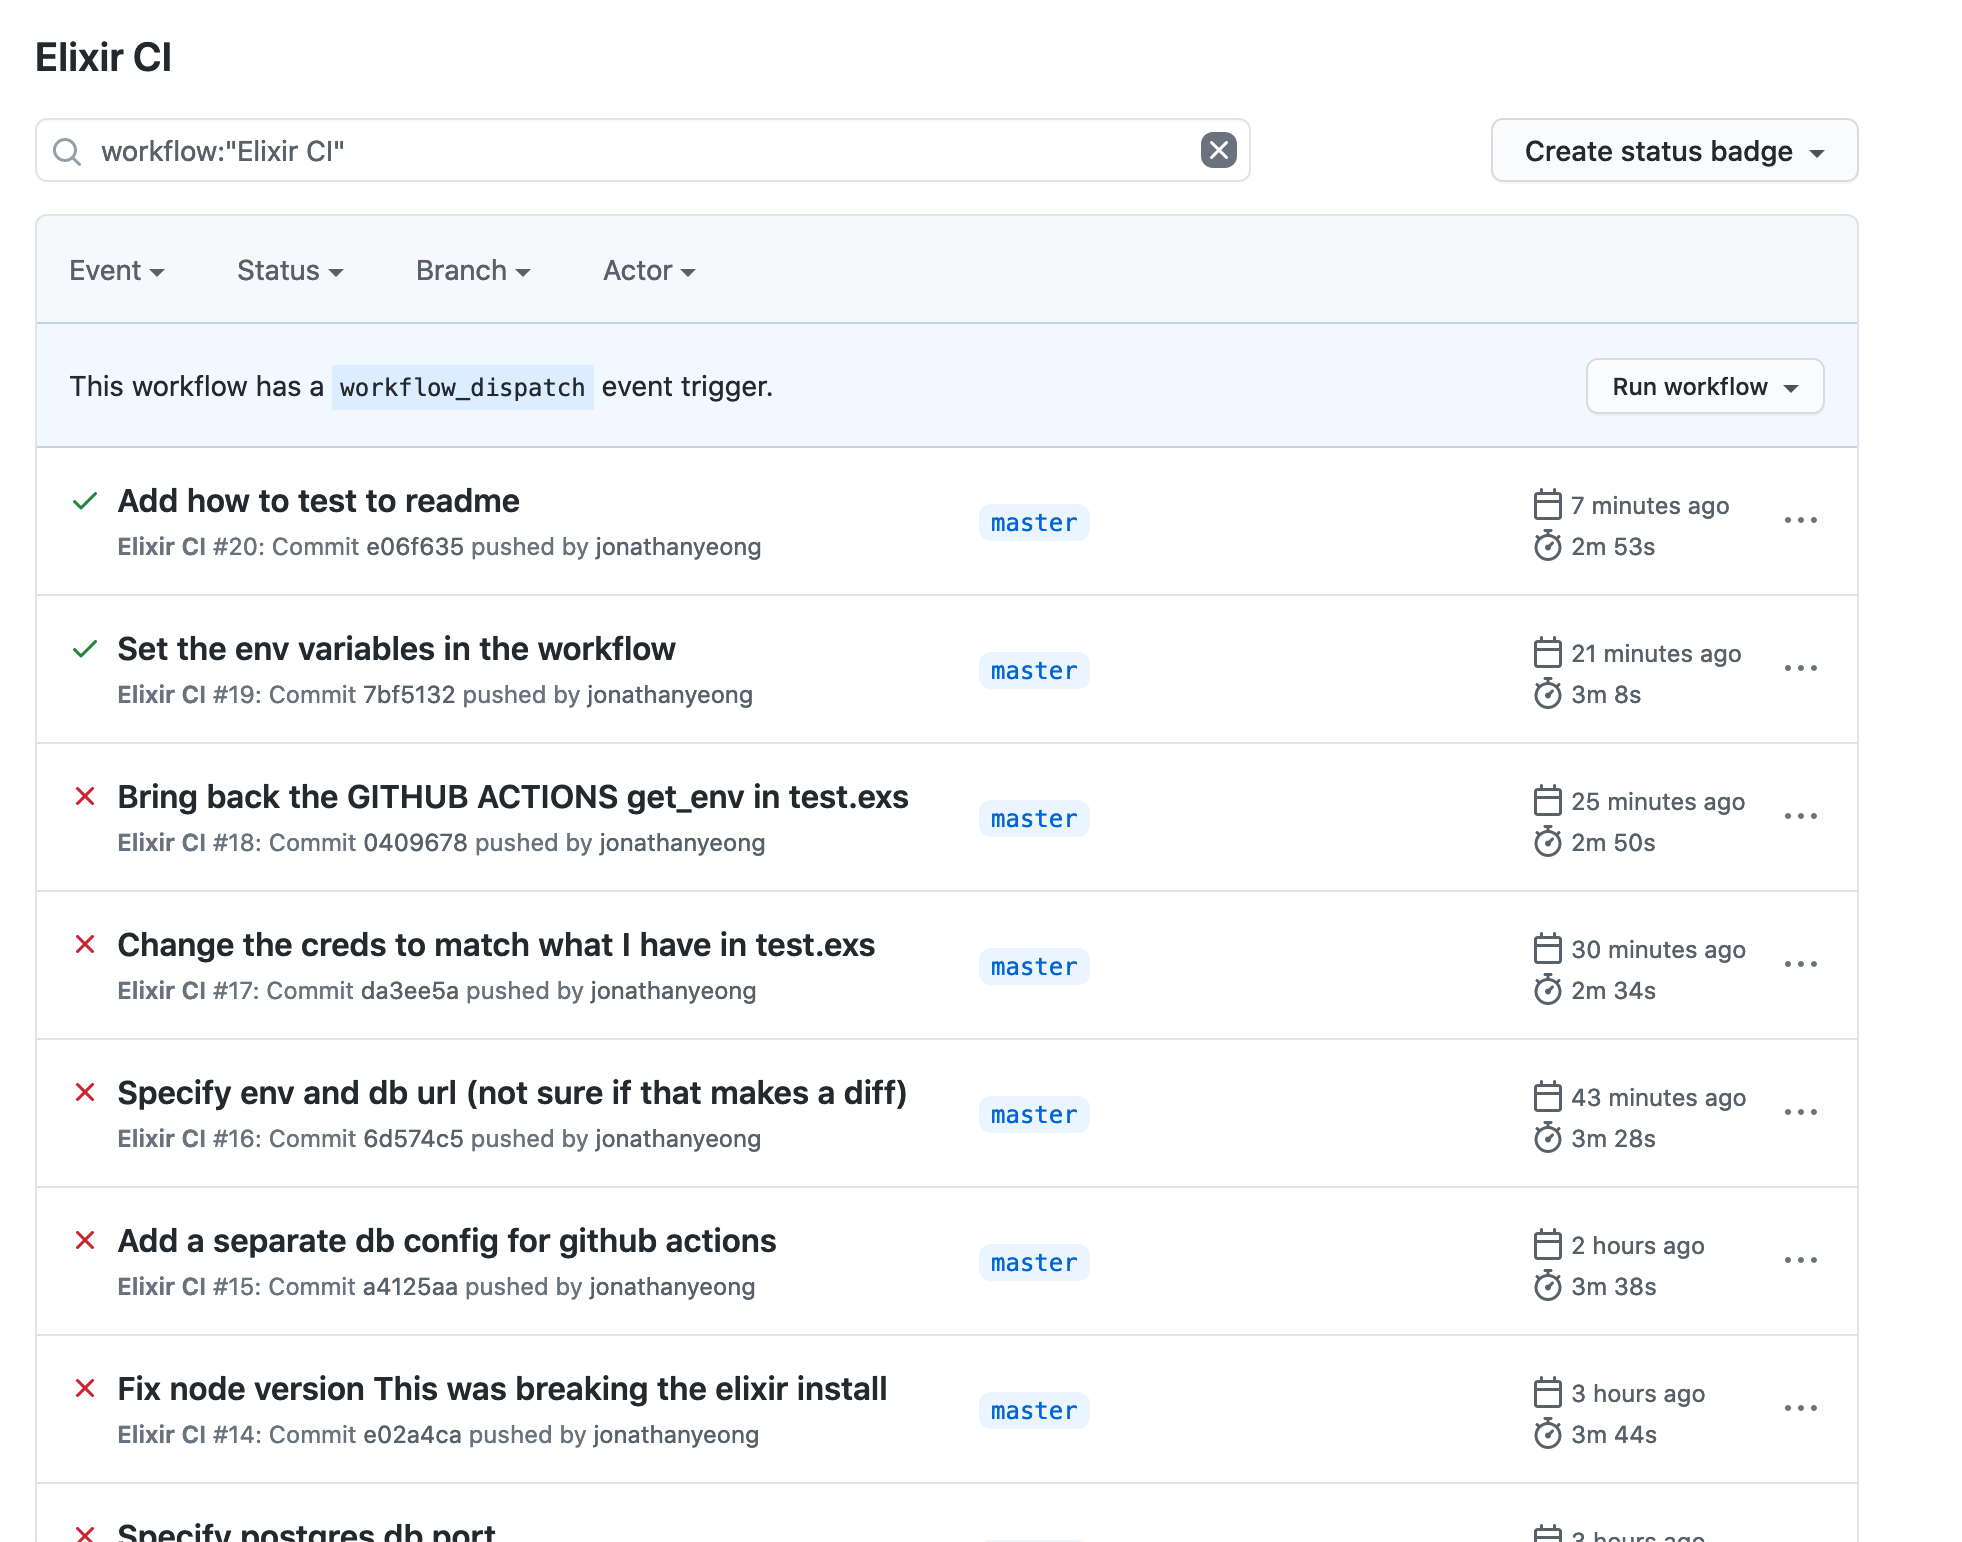
Commit your changes and push to Github. Now go to Github and navigate to the Actions tab. Here, you will see any current or past workflow runs. Every run will have a commit, the branch the commit was on, and some other metadata.

If you wanted to manually run your workflow you will have to click into the workflow. My workflow name is Elixir CI so clicking into it gives me the following page. On this page, you can run your workflow by clicking the button.
What’s next
Now every time you commit your code your tests will run and you will be notified if anything broke!
The next evolution would be to automatically deploy our application to production (continuous deployment). Stay tuned for a tutorial on that in the future.
Let me know if this article has helped you setup a CI pipeline. You can reach me on Twitter or send me an email.